Monday, February 4, 2013

Homemade Crunchwraps!

Last weekend a friend and I were going to eat taco bell after a game of ultimate frisbee. Now this may sound like a strange idea seeing as we were negating exercise with taco bell, but in Chapel Hill there is a shortage of fast food and sometimes you just get a craving for the bell. 

I ordered a random assortment of tacos and burritos and was prepared to gorge myself. When I asked my friend what she wanted me to pick her up, she requested a crunch wrap. Just one crunch wrap! It contained all of the flavors and components of a meal in one portable package!

Then it hit me! I can make my own crunch wraps! (Sure I can make my own tacos too but that's too easy) So I cobbled together the ingredients and made my own! I raided my pantry and set to work.

Start by browning some ground beef and seasoning with your favorite taco seasoning. (I really need to learn how to make my own but for now the mixes will have to do) 

Lay out all your ingredients and form a building station and get ready to stack! The ingredients I used were tortillas, refried beans, ground beef, melted cheese (for that authentic taco bell experience), tostada shells (flat crunchy tacos), Shredded lettuce, pico de gallo, and shredded cheddar cheese.

Step 1. Assemble your ingredients


Step 2. Apply meat!


Step 3. Top with melted cheese and beans.


Step 4. Separate warm and hot foods with a tostada. Then add shredded lettuce.


Step 5. Next is the fresh pico!


Step 6. Last is  the cheese because you can never have too much cheese.


Step 7. Fold into a hexagonal shape.


Above is the first one I made and was a little too full to get a good seal. Below you can see another one I made and filled a little less so that it would seal properly. I recommend getting large burrito sized tortillas if attempting this so that you can get a good seal so you can pick it up with your hands without the contents spilling everywhere.


Heat on both sides and give a press. I used another pot to press down my crunchwraps. Top with additional salsa or pico de gallo or simply pick up and devour!

Crunch Wrap Cross section

Crunch Wraps!

Ingredients

1 lb ground beef
1 package Taco seasoning
2 cups shredded cheese (Mexican blend or cheddar works here)
1 package tostada shells
1 package burrito sized tortillas
1 container pico de gallo (or fresh salsa)
1 jar nacho cheese (optional, I just wanted that extra melted goodness associated with taco bell)
1 package shredded lettuce 
1 can refried beans (or other bean of your choice)


Directions
1. Brown ground beef over medium heat until cooked through. Drain excess fat.
2. Season with taco seasoning according to package instructions.
3. Place tortilla on plate.
4. Top with ground beef (amounts of each layer should be kept thin so that crunch wrap is fold able)
5. Top beef with beans and melted cheese if using.
6. Lay tostada shell on top of warm ingredients to separate hot and cold ingredients.
7. Top tosada with a layer of shredded lettuce.
8. Add next layer of fresh salsa or pico de gallo.
9. Sprinkle cheese on top of salsa.
10. Fold sides of tortilla to the middle and form a hexagonal shape. Try to make the sides meet in the middle as best as possible.
11. Take assembled tostada and lay seam side down in a saute pan over medium heat. Press down with spatula or another pan or pot to brown tortilla.
12. Once tortilla is browned, flip over and repeat browning process.
13. Serve with additional salsa or simply devour with hands!

This recipe is not really complex and more of a shopping list than a recipe, but I think it's a great idea I hadn't thought of until recently. Several of my friends informed me that this idea is all over pinterest and I think it is an excellent idea for a fun weeknight meal. It is also easily customized and can be made with a variety of other meats or beans to accommodate vegetarian diners. Now only if I could make my own doritos taco shells...

Sunday, February 3, 2013

Fancy Desserts! Panna Cotta!

The other night I had a dinner date and needed a dessert to complete the meal! The night's activities involved making french baguettes to complement the chicken chili we were also going to make. Everything was to be made but since all of the other dishes were going to take so long we decided it would be best to make dessert ahead of time so we wouldn't have to worry about too many things. It fell upon me to decide on a dessert and I wanted to impress this person so I knew I wanted something fancy sounding that would serve as a light ending to a hearty meal. The answer to this dilemma? Panna Cotta


So Fancy!
What is panna cotta you ask? I'm not really sure! But I know Wikipedia does!

According to Wikipedia:

"Panna cotta (from Italian cooked cream) is an Italian dessert made by simmering together cream, milk and sugar, mixing this with gelatin, and letting it cool until set. It is generally from the Northern Italian region of Piedmont, although it is eaten all over Italy, where it is served with wild berries, caramel, chocolate sauce or fruit coulis."

Fascinating! Basically fancy jello! All kidding aside, this is a really easy dessert that can be dressed up in a variety of ways and ends up being a light dessert that can end up looking really beautiful depending on colors and fruits used.

Cooking wise it's not a difficult dish but does require some unique software. With the first being unflavored gelatine.


This product is available at most grocery stores in the baking needs isle and has a myriad of uses but does take some extra care. Picture above is mixing one package of gelatine with 2 tablespoons of cold water to let the gelatine "bloom". You can't just add gelatine powder to your mixes because it can clump and give you lumps. So in this step you prep your gelatine by mixing one package with 2 tablespoons of cold water and form a sort of gelatine block to be added later.

While the gelatin is blooming and waking we need to consider toppings. I wanted to make a strawberry sauce and had a frozen berry mix on hand.  I tossed about a cup of frozen berries into a small pot.

Already coloful!

On top of the berries I added half a cup of water and 1/3 a cup of sugar to form a strawberry sauce. Stir to combine and heat over medium heat.


You don't want a roiling boil, but instead just want to reduce it down into a sauce and cook it a little bit. 


Let that simmer for about 10 minutes and then cool to room temp and puree into a sauce. Strain your sauce to get out all the seeds and chunks and you have a nice and vibrant berry sauce.

Now for the actual panna cotta! Combine your milk, whipping cream and sugar in your pot.


Heat this mix over medium low heat. Do Not Boil! You just want to heat up the mix until the sugar dissolve. It doesn't take much and you won't notice a big change. You want a nice clean white color anyways to contrast your strawberry sauce.

Panna Cotta post cooking. Not much of a change but it'll set when chilled
Once the sugar has dissolved remove your pot from the heat and add your vanilla and stir in your gelatin block. Stir this until it is dissolved. At this point all the cooking is pretty much done! Now just pour your panna cotta into a serving vessel and toss in the fridge (covered) for at least 4 hours or until set. You can see the dishes and glasses I used below.

Panna Cotta for two! With two left over individual servings.

Once set, remove the vessels from the fridge and spoon your sauce so that it floats on top of the panna cotta as seen below. 

Adding the finishing touch
Serve chilled and enjoy!


Panna Cotta with Strawberry Sauce

Ingredients

200 ml milk
200 ml whipping cream
1/2 table spoon gelatin
1/4 cup sugar
1 teaspoon vanilla extract


Strawberry Sauce

1 cup fresh strawberries (or other berries) 
2 tablespoon water
1/4 cup sugar

Directions


1. Dissolve gelatin in 2 tablespoons of cold water and let it bloom for 5 to 10 minutes.
2. Combine the whipping cream, milk and sugar in medium saucepan and bring  to a simmer over medium-low heat  (Do not boil). 
3. Once sugar has dissolved, remove from heat and add vanilla extract.
4. Stir in the gelatin until completely dissolved. 
5. Pour mix into serving glasses or dishes. Clear ones work best here! 
6. Refrigerate until sets, about 4 hrs or overnight.
7. Meanwhile, wash strawberries, and place in a small saucepan. 
8. Add sugar and water and bring to a simmer over medium heat.
9. Simmer for 5 minutes and blend the mixture in a blender until smooth. 
10. Strain through a mesh sieve or strainer to remove any seeds.
11. Cool  this to room temperature then refrigerate until needed.
12. Once panna cotta has set, carefully spoon sauce on top to create a nice contrast of colors and serve chilled!

I hope you enjoy this really fancy sounding dish and use it to impress someone tonight! It really is simple and can be done with a variety of other sauces, compotes, or with some fresh fruit. I have seen some really cool pictures of chilling the panna cotta at different angles and shapes to create some very nice presentations. Give it a shot and get creative!

Friday, February 1, 2013

Celebrate a Snow Day with Tomato Soup!

Last Friday in Chapel Hill we got a little unexpected ice storm. This is mainly notable because it was 72 degrees two days later! When I got home this was the scene outside:


Now when I see weather forecasts for snow I always imagine whitey fluffy goodness falling from the sky; perfect for frolicking and snowy adventures! This however was entirely stinging ice pellets that made everything slick and treacherous. I actually ventured to the gym and fell down multiple times and surely looked like an oaf. However, during one of these unexpected trips to the ground I realized that I needed something warm and hearty to thaw my frozen aching bones. The only solution? Tomato soup! But none of that condensed stuff! Homemade Tomato Soup!


Tomato soup is a real classic that is often forgotten and relegated to childhood lunches and emergency meals when there is nothing else in the pantry. This is such a travesty because tomato soup can be so much more and when done right can warm hearts and really soothe the soul, especially on those frigid nights when snowed in. How do I make mine? Well I'm just getting to that. First, we assemble the team!

2 (28 oz) cans of crushed tomatoes, an onion, 4 fresh tomatoes, basil, and some good gruyere!
When I make tomato soup I personally like using fresh tomatoes. Most recipes use canned diced tomatoes and the beauty of this dish is that you can use mostly canned ingredients and still get a really nice soup, but I personally like using fresh ingredients when I can and in this situation I think fresh tomatoes adds a lot of brightness to the soup.

Some quick samurai action and we are ready to start cooking!
Melt some butter in your soup pot over medium heat and brown those onions! Again I forget to take a picture but I also added some minced garlic because I don't think you can go wrong with minced garlic

One of the best smells in the world is sauteed onions.

And now for the easy part! Once your onions turn translucent and you have that great onion and garlic smell permeating your house you are ready to start souping! Just dump in your cans of tomatoes, diced tomatoes, and chopped basil and let that stuff start melding together. Bring this mixture to a boil then reduce to a simmer.


Everyone in the pool!
While that comes to a simmer and starts getting happy, melt some butter in your cast iron skillet over medium heat and lay two slices of french bread down to start your fancy grilled cheese. Freshly shredded cheese goes on top and starts getting melted and gooey! (American is such a classic but I went with the Gruyere to keep it a little more adult and fancy)


As the grilled cheeses get started make sure you are checking your soup. You don't want to burn the bottom! Keep stirring it and make sure you heat isn't too high. Remember, we are simmering! Medium worked for me and you just have to be patient! Good Soup takes time and doesn't come in cans.

Starting to look like soup!
Close up view of all it's tomatoey goodness complete with Basil
It may be a little bit of a juggling act but be sure to check on your grilled cheese and once the bottoms are browned to your liking just plop one piece of bread on top of the other (cheese sides touching of course) and give it a little press. 

It may not be square but man was it tasty!
Once your soup comes to a simmer and melds for about 10 minutes its time to smooth it out. I don't own a food processor but a couple trips to the blender gave me that silky smooth texture I wanted in a soup.


Apply grilled cheese sandwiches liberally to the soup and enjoy!

Hand model Rachel showing off her soup portion
My soups always turn out a little on the fresh and acidic side, but more traditional tomato soups typically add a cup of milk or cream to give it some extra creaminess and take away some of that bite that I really enjoy but that decision is yours to make.

Basil Tomato Soup

Ingredients:

For the soup:
2 tbsp butter
1 small onion, diced
2 garlic cloves, chopped
4 tomatoes, chopped
2 28 oz can crushed tomatoes
20 basil leaves, chopped
salt and pepper

For the Grilled Cheese:
8 slices french bread
1/2 lb gruyere cheese, grated
butter

Directions:

1. Melt the butter in a large pot, and add the onion and garlic. 
2. Saute for 5 minutes until onions are cooked through. 
3. Add the canned and fresh tomatoes, and basil. Salt and pepper to taste.
4. Bring to a boil, then reduce to a simmer. Cover your soup and simmer for 20 minutes.
5. Add any additional seasonings such as thyme if desired. 
6. Puree soup with an immersion blender or in a blender until smooth. If using a blender, do not overfill the blender or you may have a soup explosion. (which isn't as cool as it sounds) 

1. For the grilled cheese, coat bottom of a cast iron skillet set over medium heat with butter.
2. Place slices of french bread in the pan and top grated cheese. 
3. Let cheese melt and checking to make sure bottoms of bread isn't burning
4. Once cheese starts melting, press slices of bread together 

Enjoy your fancy grilled cheese with your soup and stay warm!

Saturday, January 26, 2013

What's for Dinner? Japanese Curry

When you think of Japanese food, sushi is probably the first thing that comes to mind. Sushi is by far one of my favorite foods, but the cuisine has much more to offer with a variety of influences. カレー or karÄ“ is another Japanese classic that I occasionally get a craving for and is way different in concept than sushi. Where sushi is clean and fresh, Japanese rice curry is a big mix of different flavors and ingredients that is a favorite for home cooking. 


This dish is essentially a curry stew that you make in a large pot and serve over rice or noodles.  It is basically Japanese comfort food because it's warm, spicy and has that stick to your bones feeling. The best part is how easy and quick it is once you can locate some curry blocks.


Available in multiple heat levels
You may not be familiar with this type of product but it's basically blocks of concentrated curry (see awesomeness) that you add to water. These little blocks add tons of flavor and thickens the stock into a really nice stew. I found this box at Wal-mart and there is much larger variety at your local Asian market. 

The beauty of this dish is the flexibility you have with the ingredients. I personally used potatoes, carrots, and some green pepper I found in my fridge but you can pretty much add any sort of vegetable (celery, peas, broccoli, etc) and use a variety of meats. For this post I just made a curry with ground beef but you can use stew meat or beef cubes. I really recommend at the very least using carrots and potatoes as they are some of them more classic additions. The carrots add a great sweetness and color while the potatoes really gives this dish additional substance and that meat and potatoes status. 

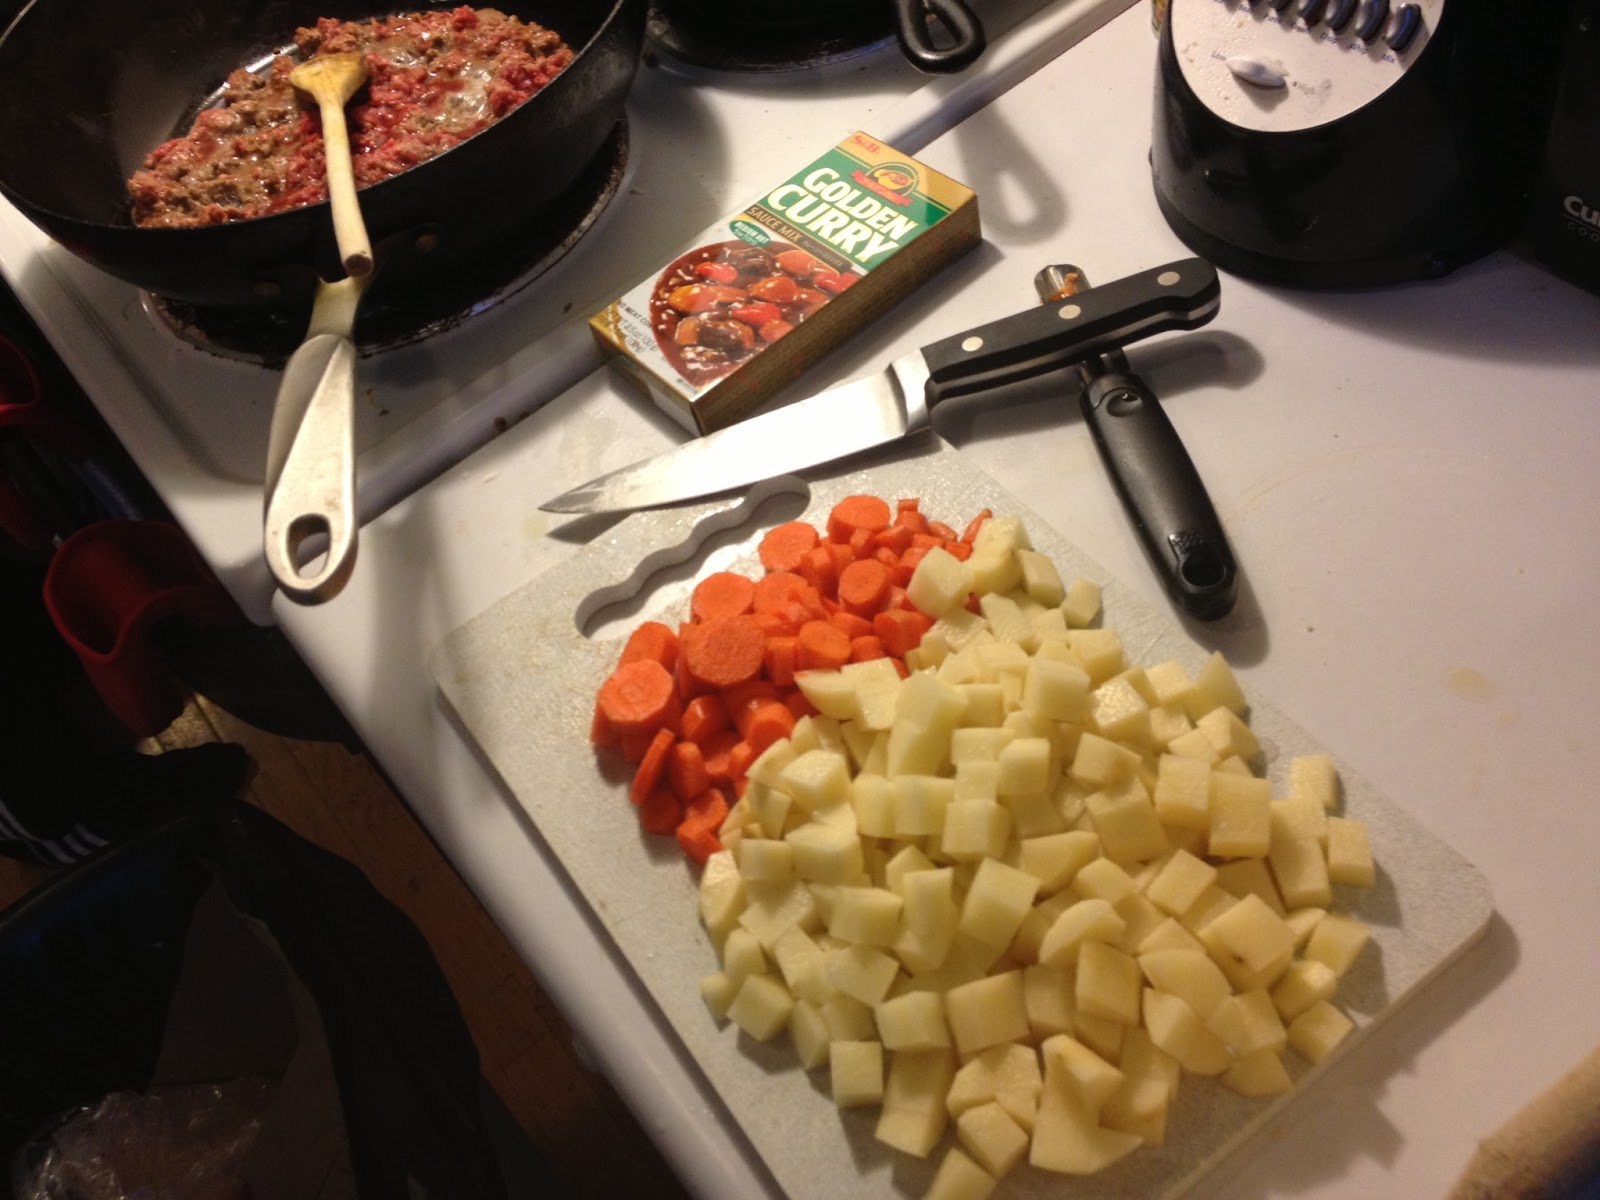
This dish is really just three steps. First you brown your meat (I used ground beef but cubed stew meat also works well) and chop your veg.

Not pictured, some green pepper I found at the last minute

Some nicely browned ground chuck
Once everything is cooked and browned toss it all together in your pan and add water just to cover everything. Raise the heat to medium-high and bring to a boil.


Once your soup is boiling bring it down to a simmer and cover for 15-20 minutes or until potatoes and carrots are soft (but not mushy!)


Once everything is nice and soft, break up the curry roux blocks and stir into soup. I so excited about eating this I stirred the blocks in immediately without pausing to take a picture, but once you stir in the block the curry will start to thicken and smelling like a traditional curry. The finished product looks something like this:


Ladle this mixture next to some rice and you have a complete meal on a plate! 


**Recipe Incoming!!!**

Japanese Rice Curry


1 lb desired meat (cubed stewing beef, ground beef, etc)
2 carrots chopped into rounds (or desired shape)
2 medium sized potato, cubed
Plus any additional vegetables, chopped (celery, peas, broccoli, etc.)
1 box Japanese curry roux
2 tsp minced garlic
salt
oil
water

Method

1. In a deep pan brown meat. If using beef cubes ensure cubes are browned on all sides
2. Add the potatoes, carrots, and other miscellaneous veg. At this step you may also add any additional seasonings or spices. I normally just add garlic but you could also add some bayleaf (just be sure to fish out bay lead prior to chowing down)
3. Add water until contents are just covered and bring to a boil. 
4. Once boiling, reduce heat to low, cover, and simmer for 15-20 minutes or until veg is soft. 
5. Break up curry blocks into smaller pieces and stir into curry. Sauce will thicken as it cools and roux is incorporated.
6. Serve with rice

If curry is not hot enough, red pepper flake or even sriracha can add additional heat or try using a spicier curry roux (I've seen mild, medium hot, and hot). There are many other variations on this dish. One variation involves making your curry and pouring it over fried chicken or fried porkchops as a sauce. Using this as a hearty sauce really complements crunchy textures well and something I'll be doing in the future. 

Thursday, January 24, 2013

Hot! Hot! Hot! Molten Lava Cake!

Today I present a really easy dessert that is great to share and sure to impress! Molten Lava Cake!


Lots of restaurants have a dessert similar to this and it never occurs to most people that they can make this at home. It's essentially a chocolate custard that you cook like a cake so that you have a nice cake-like exterior with a rich custard filling that oozes out when broken and goes great with ice cream. Best of all it's super easy and can be made in about 30 minutes! Here goes!

**Recipe Incoming**

Molten Lava Cake
(Adapted from I wash you dry)

Ingredients

4oz Semi-Sweet Chocolate (chocolate chips work here as well)

1 stick of butter (1/2 cup)


1 cup powdered sugar


3 eggs


1 egg yolk


6 tbsp flour


Vanilla Ice Cream


Instructions

1. Preheat oven to 400 degrees F.

2. Combine chocolate and butter in a microwave safe bowl combine chocolate and butter. Microwave for 1 minute and 20 seconds until chocolate is melted. Whisk the chocolate mixture until smooth.


3. Whisk in the powdered sugar.

4. Add the 3 eggs and egg YOLK and whisk until combined.

5. Whisk in 6 tablespoons of flour until combined.

6. Liberally spray your desired baking vessels with cooking spray. Give the container a good coat because you want the cake to release after baking.
This recipe can make 4 one cup cakes. Most recipes refer to custard cups or ramekins but I have had success with pyrex bowls.

7. Bake each cake on a cookie sheet for 13-15 minutes or until the outer edges are set and the center is slightly set. Because the insides of the cake are molten you won't be able to use a toothpick to test the doneness.

8. Once the outer later of the cake is cooked, remove the cakes from the oven and allow to cool for 2-3 minutes before inverting onto a plate.

9. Top each cake with a scoop of vanilla ice cream and then drizzle chocolate sauce or caramel on top to complete your fancy dessert.

10. Dig in and enjoy the delightful contrast between rich molten chocolate and ice cream. 

I love this dessert and think it's really a fun idea that most people assume is limited to a restaurant dining experience. Perfect way to end a meal if not a little extravagant. These are the kinds of recipes that I love because the end result is visually appealing with a lot of textural contrast and who would have guessed it only has 5 different ingredients! Similar recipes exist that are done entirely in a microwave inside of a coffee mug and are definitely a great way to end a day. Be sure to try this one out!

Pizza Pizza!


Living in a college town means that there are pizza places EVERYWHERE. Asides from the regular selection of chains pizza places like Dominoes, Papa John's, and Pizza Hut there is a never ending supply of pie on Franklin St. I'm pretty sure pizza is one of the basic food groups. While convenient, delivery pizza is incredibly expensive which inspired me to make my own at home. Attempt number one turned out like this

Attempt #1:


First attempt at homemade pizza

I made my first pizza using store bought dough. The dough was a little sticky but it out, threw on some pizza sauce and topped with green peppers, mushrooms, and pepperoni. Baked at 400 for about 20 minutes or until the cheesy was melted and started bubbling...

Verdict: Not bad if not a bit soggy on the bottom.

The pizza turned out a little thick and chewy and reminded me of sicilian pizza but the bottom was a little soggy and didn't seemed cooked. More like pizza bread than an actual pizza pie. It certainly did the job and cost me less than 10 dollars to make 2 pretty large pizzas. This was by far the quickest and easiest way to make home made pizza as everything could be bought and done in under an hour.

I guess you could say mission accomplished as my stomach was full and my pizza craving was sated, but I wasn't prepared to call myself a pizza chef. The sogginess really bugged me and while I did share with my room mates I don't think it wasn't going to compete with anything from any of the local pizza places. The next step was to make my own dough and modify my baking method. 

Attempt #2:


Second attempt at pizza. At least it's round!


Hey not bad! At least it looks more like a traditional pizza and it tasted more like an actual pizza! What did I do differently? Well that would involve making a dough with the dreaded y word...

Yeast


Working with yeast can be a terrifying thing and something I've always avoided because the darn stuff is alive and really picky. Nothing is scarier than the thought of working with a living organism and having it dying on you only to leave you with a lifeless, inedible lump. But we are getting ahead of ourselves. Let's start with the most time consuming part. The dough.


**Recipe Incoming!**


Pizza Dough

(recipe courtesy Giada De Laurentiis)

Ingredients
·         1 1/2 cups warm water, 100 to 110 degrees F, plus extra as needed
·         1 (1/4-ounce) packet active dry yeast
·         5 cups all-purpose flour, plus extra as needed
·         1 1/2 teaspoons fine sea salt
·         Olive oil, for drizzling

Directions 

1. Put the warm water in a small bowl. The temperature is important here! Too hot and you can kill the yeast and too cold and they won't wake up from their dried state. Measuring with a thermometer is a best but with some practice you can get used to the desired temperature range. It should feel lukewarm and not hot. Add the yeast and stir until dissolved. You should end up with a tan colored slurry that smells pretty strongly of yeast.

2. In a large mixing bowl, whisk together the flour and salt. Add the yeast solution and incorporate until everything pulls together into a soft dough. This step may require some adjustment based on the humidity of your kitchen. If the dough is too dry and doesn't pull together into one big ball you may need to add extra water one tablespoon at a time. If the dough appears too sticky and starts sticking to the sides you'll need to add extra flour (1 tablespoon at a time just like the water). Using this recipe I've always had dough that is too dry and had to add at least one extra tablespoon of water to get a good product.

3. Transfer the dough to a floured work surface and get ready for a work out! Flour up your hands and really give that dough a good knead until you feel the consistency change. This is a crucial step in making good dough and good bread because you are forming the gluten! This part takes some practice in learning when you reached that desired consistency and have kneaded the dough enough. The original recipe called for kneading for 10 to 12 minutes but I've found that really great dough takes a good 20 minutes of kneading by hand. Problem is you will get tired of kneading before 20 minutes but trust me, that extra effort really goes a long way. This step can also be done in a mixer with a dough hook but as a young professional living in an apartment I don't yet have my own mixer and I could always use the extra arm work out! 

Note: There is a really cool way to visually tell if your dough has formed enough gluten by doing something called "pulling a window pane". This technique involves taking a piece of dough and stretching it out until it's thin enough that you can see through it. If you have kneaded your dough sufficiently then the gluten will form a matrix and you should be able to see through the dough as if you were looking through a window. More likely than not your dough will tear before you can stretch it far enough and you will need to knead it some more. I really wish I had a picture of this, but bear with me and I will revisit dough making in the future and be sure to document this for you!

4. Coat the inside of a clean bowl with olive oil and toss the freshly kneaded dough in the bowl. Cover loosely with plastic wrap or a damp kitchen towel. Set the bowl in a warm place until the dough has doubled in size. This takes about 2 hours.

5. Once the dough has double in size, deflate the dough using a fist and get out all the extra air. This is such a scary step because it depends on your yeast and whether the little guys were woken up. I've had a couple batches not rise at all because I either killed the yeast or used expired yeast. Be sure you check your expiration dates! 

6. Once you have your deflated dough you can separate it into multiple pieces and you have ready to use pizza dough! Extra pieces can be wrapped in plastic wrap and refrigerated for up to 24 hours.

7. To make actual pizza from your dough, Place a pizza stone on the bottom rack of a cold oven. Then set the temperature to 500 degrees and allow your pizza stone to heat up along with the oven. Never place a cold stone in a preheated oven because this can cause cracking and you'll have to get yourself a new stone.

8. Roll out dough to desired thickness and top with desired sauces and toppings. I personally like pesto pizzas with mushrooms. 

9. Transfer pizza to pizza stone and bake pizza for 10 minutes or until cheese is melted and starts bubbling. A pizza peel is crucial here but a spatula can be used in a bind but can be tricky to transfer pizzas with lots of toppings. 

10. Slice pizza into desired slices/wedges/sections and enjoy!

I went ahead and made a couple pizzas to test my home made dough. My first use of homemade dough was a pesto pizza topped with mozzarella and feta cheese. It looked like this prior to baking:


My first pizza using home made dough. Pesto Pizza with feta cheese.
After baking on a pizza stone at 500 degrees for about 10 minutes the finished product looked like this:

Freshly baked pesto pizza from Attempt #2
The results weren't too bad and it definitely looked more like a traditional pizza and tasted much better than my pizza bread experiment from attempt #1. I also had plenty of dough and made another pizza with a red sauce, pepperoni and green peppers. When placed on my pizza stone it looked like this:

My kind of Pepperoni Pizza on a pizza stone.

Another 10 minutes later and we have this:

Almost looks like a Digiorno !

Overall the second attempt was much better than the first and making dough from scratch wasn't as scary as I initially thought it might be. However, I rolled out attempt #2 with a rolling pin and the pizza ended up a little thick. It was a little chewier than I like my pizzas and I was determined to keep getting better. In my mind I had upgraded from pizza bread to frozen pizza and I still wanted to reach pizzeria quality pie! You know what that means...

Attempt #3

My latest attempt at pizza!

Now that's what I'm talking about!

Looks like a pizza, has a noticeable outer crust and has a nice crunch to the crust and I made it all from scratch! 

For this last attempt I tried a couple different things. First I kneaded the dough for a full 20 minutes. I found that when you don't knead dough long enough you get dough that keeps retracting and won't flatten when you try to form the pizza. Sometimes this is a result of gluten seizing and it just needs a rest. If you ever find that your dough won't roll out, cover it and let it rest for 20 minutes and it should relax a little bit. If it doesn't after a good rest then you may have needed some additional kneading. For attempt #3 I made sure I kneaded the heck out of the dough and got a really nice consistency that I can only describe as ideal pizza dough. 

Once I had my dough the right consistency and flattened out into my circle I brushed the top with a little bit of olive oil and topped it with sauce, cheese, olives, and pepperonis. I also brushed the crust with some olive oil to give it a nice sheen. I also baked it at 500 degrees on my pizza stone for 10 minutes and was rewarded with pizza I was proud to claim as my own. I was happy with the look and taste of it and really can't see myself ever ordering expensive delivery again! 

-----------------------------------------------------------------------------------------------

Whew!

If you've made it this far then you must be either really dedicated to pizza or like me enough to trudge through 3 pizza attempts and my long winded writing! Thanks for sticking with me through my first official recipe blog post. It's still a learning process and I'm trying out some different styles and organization principles for my posts and I will definitely be retooling future posts. I definitely need more pictures so stay on the look out for future updates as I will be sure to take more in progress pictures. My pizza project was really a 2 week process in which I only recorded the finished product and I will be sure to take more pictures for future projects. Thanks for reading and looking for another post soon! 

- Wyt