Wednesday, April 17, 2013

Oatmeal Cream Pies! Made at Home!


I recently posted a picture of my most recent baking adventure on facebook and the response was overwhelming positive with many people asking me how I did it. Honestly, it couldn't be easier!

Last weekend I took a much needed break to my friends mountain house out in Sparta, NC. This is a rare treat for me that basically entails getting away from everyday life and just spending some relaxing time in a remote location with friends. I spend most of my time hiking, eating food, and laying around... pretty much everything I want from a real vacation. One of the best parts of these little excursions is that I take the opportunity to eat whatever I want and really just relax and enjoy myself. This means cooking a special treat and getting to share it with others. This time up the mountain we had a group of ~ 20 people heading up there and I decided that I wanted to challenge myself and provide food for 20 people. 

Let me tell you that trying to cook for 20 people is incredibly difficult. 

As soon as I agreed to cook a single meal for all my friends I realized that I had to consider what to cook that 20 people would like, how to cook enough food to feed everyone, how am I going to transport so much food, what do I do about vegetarians, and how am I going to pay to feed 20 people? 

The answer to this dilemma? Spaghetti.

Everyone loves spaghetti, it's cheap, it's portable, and it's easy to make. Additionally, I realized that I could prep the noodles ahead of time mix it with sauce and cover it with cheese and create a baked spaghetti dish that could finish baking when I arrive at the house! Genius!

The night before I went up I went ahead and made 20 pounds of spaghetti and placed them in disposable chafing so that I could easily transport them and off I went! I wish I had taken a picture of this because 20 pounds of spaghetti is truly a sight to behold and while the dishes themselves weren't heavy it was still an enormous amount of food!

Now how does spaghetti equal oatmeal cream pies? Well no baked spaghetti dinner is complete without some dessert to complement that tomato-ey goodness! When deciding on a dessert I wanted something portable, easy to serve and eat, and was fun! That's when it hit me, why don't I make my own oatmeal cream pies? 

Everyone loves spaghetti and everyone loves individually wrapped caloric bombs they remembered from their bag lunches. In my mind this was the perfect dessert!

I unfortunately didn't take many pictures of the cooking process but I assure you it was not difficult and I will include the recipe. I hope you give this a shot and enjoy! I know my friends loved them and they were all gone on the first night.

Homemade Oatmeal Cream Pies
For Cookies:
1 cup (2 sticks) unsalted butter, softened

3/4 cup light brown sugar
1/2 cup granulated sugar
2 eggs
1 tablespoon honey
1 teaspoon vanilla extract
1 and 3/4 cups all-purpose flour
1 teaspoon baking soda
1/8 teaspoon cinnamon
1/4 teaspoon salt
1 and 1/2 cups quick cooking oats


For Cream Filling:
3/4 cup (1.5 sticks unsalted butter, softened
3 cups powdered sugar
3 tablespoons heavy cream
1 and 1/2 teaspoons vanilla extract
pinch of salt

Directions: This recipe makes about 48 cookies or 24 pies

Preheat oven to 350 degrees F
Line baking sheets with parchment paper

In a bowl use a mixer and cream together butter and sugars until light and fluffy. Add eggs, honey, and vanilla and mix until incorporated.


In another mixing bowl, whisk flour, baking soda, cinnamon, and salt. Slowly add your dry ingredients to the butter mixture and blend on low  until just incorporated. Stir in oats until evenly distributed. Chill dough in refrigerator to help firm up and make scoopable.


Remove dough from refrigerator and drop by rounded tablespoons onto baking sheet. Try to make each ball of dough as uniform as possible so that each cookie is roughly the same size and fits together perfectly. Be sure to put space in between each cookie as they will spread out during the baking process 


Bake for 8 to 10 minutes, or until just browned. Let stand on baking sheet until set and then transfer to a cooling rack to cool.


While the cookies are cooling prepare your cream filling! You could easily use store bought marshmallow cream straight out of a jar or even thin it out with some butter and sugar to create a nice fluffy cream but I personally prefer making an icing and controlling what goes into my cookies.


Beat butter with your mixer for about 1 minute until creamy. Carefully add the powdered sugar and mix on medium speed for 1-2 minutes. Pour in heavy cream and vanilla extract and mix on 3-4 minutes or until fluffy. This is how I would normally make an icing but the addition of heavy adds a nice creaminess to the icing that makes it perfect for sandwich cookies. Be sure to taste this mix and add salt if mixture is too sweet. If filling is way too thick, add a couple more teaspoons of heavy cream.

Once your cookies are cool, spread 1 and 1/2 tablespoons of cream filling on a cookie and match it up with another cookie of roughly the same size. Lightly squeeze the two cookies together and enjoy! 


Monday, March 18, 2013

A Late St. Patricks Day Treat! Shepherds Pie!

Hey everyone! I'm sorry I've let a whole month slip by without any posts! I have been very busy with work and I actually got a new job to show for all my efforts! With my financial future secured and one less stressor out of the way I can now focus on getting my food blog back on a regular schedule. My goal is to update once a week and ideally on Saturdays but we'll see what works best for me. For today I bring you a pretty simple dish that most people don't ever think to make... Shepherd's Pie. 

I know it's not technically Irish and what people think of as shepherd's pie can vary from place to place, but I envision shepherd's pie as a casserole consisting of ground beef, carrots, peas, and onions topped with creamy mashed potatoes and baked until nice and toasty. Perfect filling food on that can often be made with things you probably already have! I personally already had some frozen peas, carrots and onions (that I use for salads), potatoes (which I always keep on hand for mashed potatoes and french fries) as well as some ground beef. I didn't even have to go to the grocery store for this meal. So without further ado, here is my recipe for shepherd's pie.

Shepherd's Pie


Ingredients:
Mashed Potato Topping
  • 5-6 large potatoes, peeled and cut into thirds
  • 1/4 cup of milk
  • 2-3 tbsp butter
  • Salt + Pepper
  • Chives, chopped
"Pie Filling"
  • 1 tsp olive oil
  • 1 medium sized onion, diced
  • 2 large carrots, diced
  • 2 cloves of garlic, minced
  • 1 1/2 lbs of lean ground beef
  • 1-2 tsp Worcestershire sauce
  • 1 cup frozen peas, thawed
  • 2 tsp dried thyme
  • Salt + Pepper
  • 2 tbsp butter
  • 2 tbsp flour
  • 1 1/4 cup beef broth

Shepherd's Pie

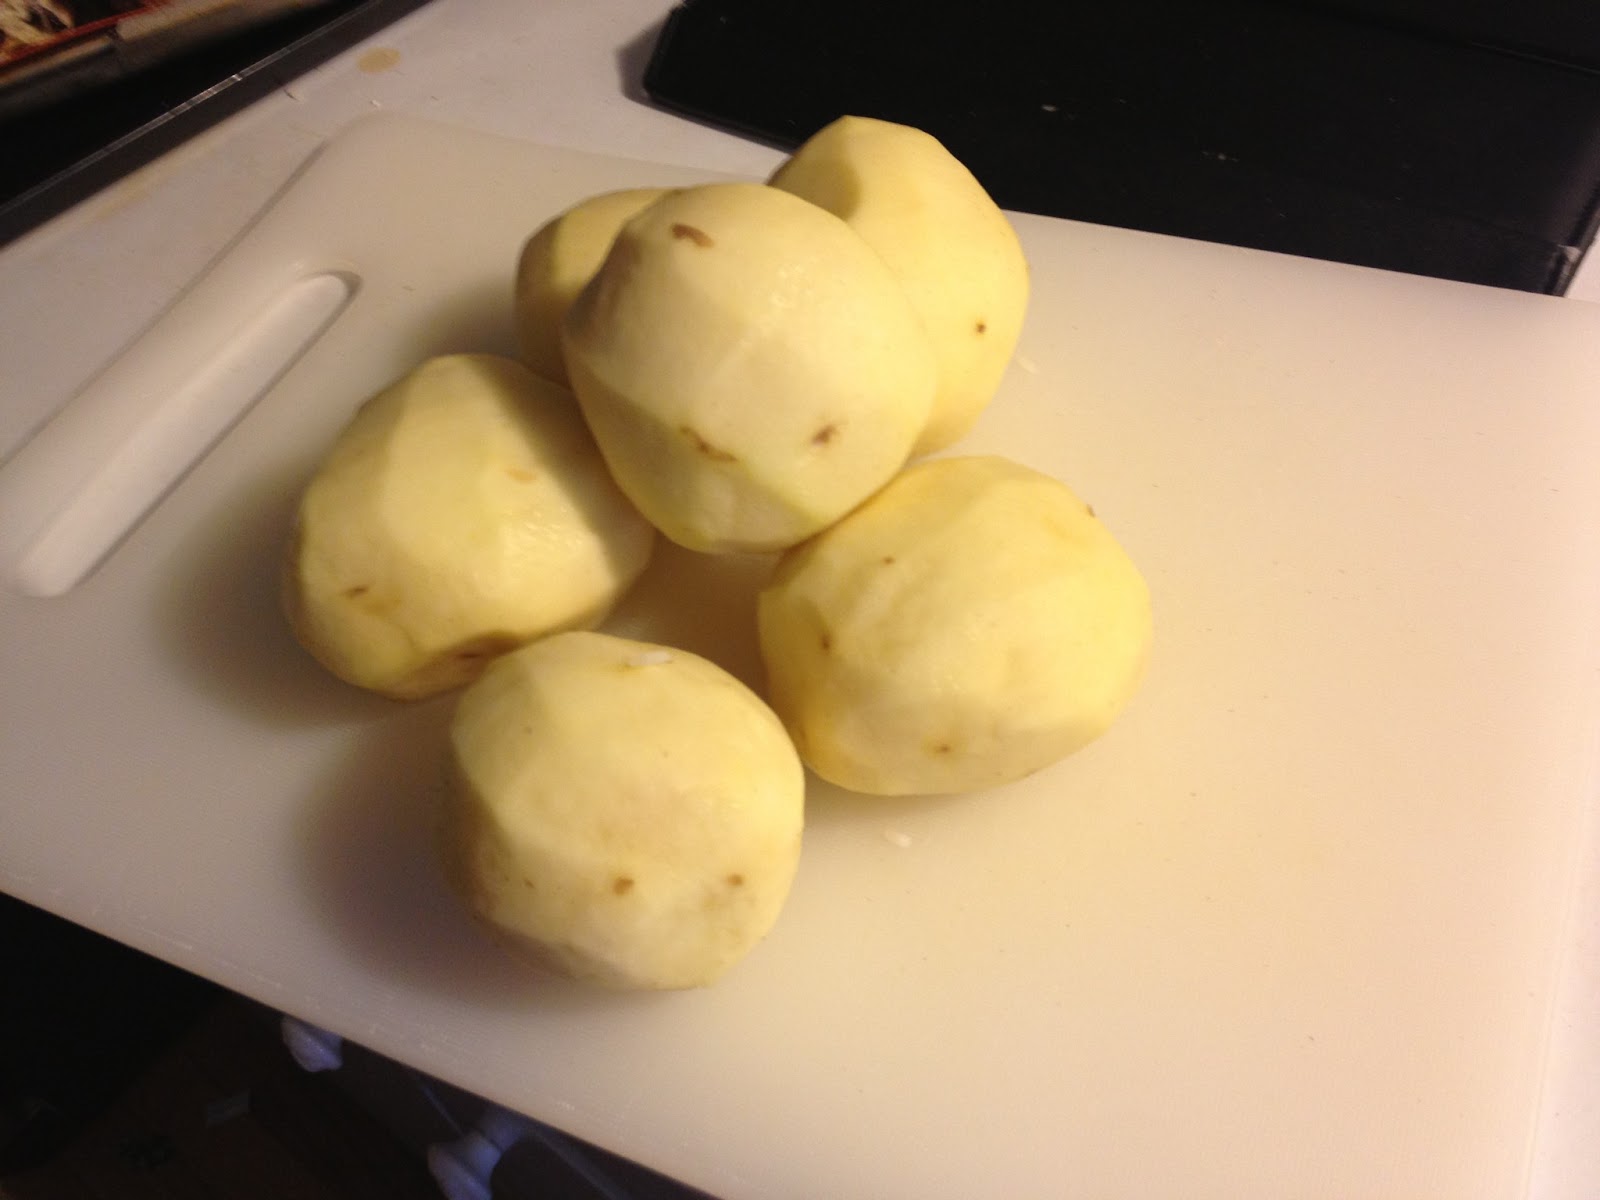
Step 1: Acquire Potatoes


Step 2: Peel Potatoes


Step 3: Chop potatoes into smaller pieces that are roughly the same size so that they cook evenly.


Step 4: Cover potatoes with water and bring to a boil. Boil for 5-8 minutes or until potatoes are fork tender and mashable. 


Step 5: Drain!


Step 6: Add milk and butter and mash with a fork or potato masher. Can add additional milk or butter to suit preferences. I prefer creamy potatoes but still a little chunky.


Step 7: Saute carrots and onions in olive oil until onions start to turn translucent.


Step 8: Set veg aside and brown ground beef.


Step 9: Once ground beef is cooked through reincorporate vegetables and add Worcestershire sauce, garlic, thyme, and salt and pepper to taste. I also added some soy sauce for some additional depth of flavor.


Step 10: Add peas to meat mixture and stir to combine.


Step 11: Set meat filling aside in casserole dish. Don't forget to preheat that oven to 400 degrees!


Step 12: Melt 2 tablespoons of butter in pan.


Step 13: Add 2 tablespoons of flour and stir to incorporate making a roux. Work quickly so that the flour does not burn. This mixture may not look appetizing but it is essentially a thickening agent that will help create a nice sauce.


Step 14: Stir in beef broth and allow to thicken slightly almost to a gravy consistency.


Step 15: Pour sauce over meat mixture and mix well.


Step 16: Top meat mixture with mashed potatoes. Note that I also mixed some diced chives into my mashed potatoes for some additional flavor!


Step 17: Bake for 30 minutes at 400 degrees or until top is lightly browned.


Step 18: Serve and enjoy! This is a nice hearty meal made with simple ingredients in a unique way. Great to share and easy on the budget! I hope you enjoy.


All the directions in one place:
1. Acquire Potatoes
2. Peel Potatoes
3. Chop potatoes into smaller pieces that are roughly the same size so that they cook evenly.
4. Cover potatoes with water and bring to a boil. Boil for 5-8 minutes or until potatoes are fork tender and mashable. 
5. Drain!
6. Add milk and butter and mash with a fork or potato masher. Can add additional milk or butter to suit preferences. I prefer creamy potatoes but still a little chunky.
7. Saute carrots and onions in olive oil until onions start to turn translucent.
8. Set veg aside and brown ground beef.
9. Once ground beef is cooked through reincorporate vegetables and add Worcestershire sauce, garlic, thyme, and salt and pepper to taste. I also added some soy sauce for some additional depth of flavor.
10. Add peas to meat mixture and stir to combine.
11. Set meat filling aside in casserole dish. Don't forget to preheat that oven to 400 degrees!
12. Melt 2 tablespoons of butter in pan.
13. Add 2 tablespoons of flour and stir to incorporate making a roux. Work quickly so that the flour does not burn. This mixture may not look appetizing but it is essentially a thickening agent that will help create a nice sauce.
14. Stir in beef broth and allow to thicken slightly almost to a gravy consistency.
15. Pour sauce over meat mixture and mix well.
16. Top meat mixture with mashed potatoes. Note that I also mixed some diced chives into my mashed potatoes for some additional flavor!
17. Bake for 30 minutes at 400 degrees or until top is lightly browned.
18. Serve and enjoy! This is a nice hearty meal made with simple ingredients in a unique way. Great to share and easy on the budget! I hope you enjoy.


Monday, February 4, 2013

Homemade Crunchwraps!

Last weekend a friend and I were going to eat taco bell after a game of ultimate frisbee. Now this may sound like a strange idea seeing as we were negating exercise with taco bell, but in Chapel Hill there is a shortage of fast food and sometimes you just get a craving for the bell. 

I ordered a random assortment of tacos and burritos and was prepared to gorge myself. When I asked my friend what she wanted me to pick her up, she requested a crunch wrap. Just one crunch wrap! It contained all of the flavors and components of a meal in one portable package!

Then it hit me! I can make my own crunch wraps! (Sure I can make my own tacos too but that's too easy) So I cobbled together the ingredients and made my own! I raided my pantry and set to work.

Start by browning some ground beef and seasoning with your favorite taco seasoning. (I really need to learn how to make my own but for now the mixes will have to do) 

Lay out all your ingredients and form a building station and get ready to stack! The ingredients I used were tortillas, refried beans, ground beef, melted cheese (for that authentic taco bell experience), tostada shells (flat crunchy tacos), Shredded lettuce, pico de gallo, and shredded cheddar cheese.

Step 1. Assemble your ingredients


Step 2. Apply meat!


Step 3. Top with melted cheese and beans.


Step 4. Separate warm and hot foods with a tostada. Then add shredded lettuce.


Step 5. Next is the fresh pico!


Step 6. Last is  the cheese because you can never have too much cheese.


Step 7. Fold into a hexagonal shape.


Above is the first one I made and was a little too full to get a good seal. Below you can see another one I made and filled a little less so that it would seal properly. I recommend getting large burrito sized tortillas if attempting this so that you can get a good seal so you can pick it up with your hands without the contents spilling everywhere.


Heat on both sides and give a press. I used another pot to press down my crunchwraps. Top with additional salsa or pico de gallo or simply pick up and devour!

Crunch Wrap Cross section

Crunch Wraps!

Ingredients

1 lb ground beef
1 package Taco seasoning
2 cups shredded cheese (Mexican blend or cheddar works here)
1 package tostada shells
1 package burrito sized tortillas
1 container pico de gallo (or fresh salsa)
1 jar nacho cheese (optional, I just wanted that extra melted goodness associated with taco bell)
1 package shredded lettuce 
1 can refried beans (or other bean of your choice)


Directions
1. Brown ground beef over medium heat until cooked through. Drain excess fat.
2. Season with taco seasoning according to package instructions.
3. Place tortilla on plate.
4. Top with ground beef (amounts of each layer should be kept thin so that crunch wrap is fold able)
5. Top beef with beans and melted cheese if using.
6. Lay tostada shell on top of warm ingredients to separate hot and cold ingredients.
7. Top tosada with a layer of shredded lettuce.
8. Add next layer of fresh salsa or pico de gallo.
9. Sprinkle cheese on top of salsa.
10. Fold sides of tortilla to the middle and form a hexagonal shape. Try to make the sides meet in the middle as best as possible.
11. Take assembled tostada and lay seam side down in a saute pan over medium heat. Press down with spatula or another pan or pot to brown tortilla.
12. Once tortilla is browned, flip over and repeat browning process.
13. Serve with additional salsa or simply devour with hands!

This recipe is not really complex and more of a shopping list than a recipe, but I think it's a great idea I hadn't thought of until recently. Several of my friends informed me that this idea is all over pinterest and I think it is an excellent idea for a fun weeknight meal. It is also easily customized and can be made with a variety of other meats or beans to accommodate vegetarian diners. Now only if I could make my own doritos taco shells...

Sunday, February 3, 2013

Fancy Desserts! Panna Cotta!

The other night I had a dinner date and needed a dessert to complete the meal! The night's activities involved making french baguettes to complement the chicken chili we were also going to make. Everything was to be made but since all of the other dishes were going to take so long we decided it would be best to make dessert ahead of time so we wouldn't have to worry about too many things. It fell upon me to decide on a dessert and I wanted to impress this person so I knew I wanted something fancy sounding that would serve as a light ending to a hearty meal. The answer to this dilemma? Panna Cotta


So Fancy!
What is panna cotta you ask? I'm not really sure! But I know Wikipedia does!

According to Wikipedia:

"Panna cotta (from Italian cooked cream) is an Italian dessert made by simmering together cream, milk and sugar, mixing this with gelatin, and letting it cool until set. It is generally from the Northern Italian region of Piedmont, although it is eaten all over Italy, where it is served with wild berries, caramel, chocolate sauce or fruit coulis."

Fascinating! Basically fancy jello! All kidding aside, this is a really easy dessert that can be dressed up in a variety of ways and ends up being a light dessert that can end up looking really beautiful depending on colors and fruits used.

Cooking wise it's not a difficult dish but does require some unique software. With the first being unflavored gelatine.


This product is available at most grocery stores in the baking needs isle and has a myriad of uses but does take some extra care. Picture above is mixing one package of gelatine with 2 tablespoons of cold water to let the gelatine "bloom". You can't just add gelatine powder to your mixes because it can clump and give you lumps. So in this step you prep your gelatine by mixing one package with 2 tablespoons of cold water and form a sort of gelatine block to be added later.

While the gelatin is blooming and waking we need to consider toppings. I wanted to make a strawberry sauce and had a frozen berry mix on hand.  I tossed about a cup of frozen berries into a small pot.

Already coloful!

On top of the berries I added half a cup of water and 1/3 a cup of sugar to form a strawberry sauce. Stir to combine and heat over medium heat.


You don't want a roiling boil, but instead just want to reduce it down into a sauce and cook it a little bit. 


Let that simmer for about 10 minutes and then cool to room temp and puree into a sauce. Strain your sauce to get out all the seeds and chunks and you have a nice and vibrant berry sauce.

Now for the actual panna cotta! Combine your milk, whipping cream and sugar in your pot.


Heat this mix over medium low heat. Do Not Boil! You just want to heat up the mix until the sugar dissolve. It doesn't take much and you won't notice a big change. You want a nice clean white color anyways to contrast your strawberry sauce.

Panna Cotta post cooking. Not much of a change but it'll set when chilled
Once the sugar has dissolved remove your pot from the heat and add your vanilla and stir in your gelatin block. Stir this until it is dissolved. At this point all the cooking is pretty much done! Now just pour your panna cotta into a serving vessel and toss in the fridge (covered) for at least 4 hours or until set. You can see the dishes and glasses I used below.

Panna Cotta for two! With two left over individual servings.

Once set, remove the vessels from the fridge and spoon your sauce so that it floats on top of the panna cotta as seen below. 

Adding the finishing touch
Serve chilled and enjoy!


Panna Cotta with Strawberry Sauce

Ingredients

200 ml milk
200 ml whipping cream
1/2 table spoon gelatin
1/4 cup sugar
1 teaspoon vanilla extract


Strawberry Sauce

1 cup fresh strawberries (or other berries) 
2 tablespoon water
1/4 cup sugar

Directions


1. Dissolve gelatin in 2 tablespoons of cold water and let it bloom for 5 to 10 minutes.
2. Combine the whipping cream, milk and sugar in medium saucepan and bring  to a simmer over medium-low heat  (Do not boil). 
3. Once sugar has dissolved, remove from heat and add vanilla extract.
4. Stir in the gelatin until completely dissolved. 
5. Pour mix into serving glasses or dishes. Clear ones work best here! 
6. Refrigerate until sets, about 4 hrs or overnight.
7. Meanwhile, wash strawberries, and place in a small saucepan. 
8. Add sugar and water and bring to a simmer over medium heat.
9. Simmer for 5 minutes and blend the mixture in a blender until smooth. 
10. Strain through a mesh sieve or strainer to remove any seeds.
11. Cool  this to room temperature then refrigerate until needed.
12. Once panna cotta has set, carefully spoon sauce on top to create a nice contrast of colors and serve chilled!

I hope you enjoy this really fancy sounding dish and use it to impress someone tonight! It really is simple and can be done with a variety of other sauces, compotes, or with some fresh fruit. I have seen some really cool pictures of chilling the panna cotta at different angles and shapes to create some very nice presentations. Give it a shot and get creative!

Friday, February 1, 2013

Celebrate a Snow Day with Tomato Soup!

Last Friday in Chapel Hill we got a little unexpected ice storm. This is mainly notable because it was 72 degrees two days later! When I got home this was the scene outside:


Now when I see weather forecasts for snow I always imagine whitey fluffy goodness falling from the sky; perfect for frolicking and snowy adventures! This however was entirely stinging ice pellets that made everything slick and treacherous. I actually ventured to the gym and fell down multiple times and surely looked like an oaf. However, during one of these unexpected trips to the ground I realized that I needed something warm and hearty to thaw my frozen aching bones. The only solution? Tomato soup! But none of that condensed stuff! Homemade Tomato Soup!


Tomato soup is a real classic that is often forgotten and relegated to childhood lunches and emergency meals when there is nothing else in the pantry. This is such a travesty because tomato soup can be so much more and when done right can warm hearts and really soothe the soul, especially on those frigid nights when snowed in. How do I make mine? Well I'm just getting to that. First, we assemble the team!

2 (28 oz) cans of crushed tomatoes, an onion, 4 fresh tomatoes, basil, and some good gruyere!
When I make tomato soup I personally like using fresh tomatoes. Most recipes use canned diced tomatoes and the beauty of this dish is that you can use mostly canned ingredients and still get a really nice soup, but I personally like using fresh ingredients when I can and in this situation I think fresh tomatoes adds a lot of brightness to the soup.

Some quick samurai action and we are ready to start cooking!
Melt some butter in your soup pot over medium heat and brown those onions! Again I forget to take a picture but I also added some minced garlic because I don't think you can go wrong with minced garlic

One of the best smells in the world is sauteed onions.

And now for the easy part! Once your onions turn translucent and you have that great onion and garlic smell permeating your house you are ready to start souping! Just dump in your cans of tomatoes, diced tomatoes, and chopped basil and let that stuff start melding together. Bring this mixture to a boil then reduce to a simmer.


Everyone in the pool!
While that comes to a simmer and starts getting happy, melt some butter in your cast iron skillet over medium heat and lay two slices of french bread down to start your fancy grilled cheese. Freshly shredded cheese goes on top and starts getting melted and gooey! (American is such a classic but I went with the Gruyere to keep it a little more adult and fancy)


As the grilled cheeses get started make sure you are checking your soup. You don't want to burn the bottom! Keep stirring it and make sure you heat isn't too high. Remember, we are simmering! Medium worked for me and you just have to be patient! Good Soup takes time and doesn't come in cans.

Starting to look like soup!
Close up view of all it's tomatoey goodness complete with Basil
It may be a little bit of a juggling act but be sure to check on your grilled cheese and once the bottoms are browned to your liking just plop one piece of bread on top of the other (cheese sides touching of course) and give it a little press. 

It may not be square but man was it tasty!
Once your soup comes to a simmer and melds for about 10 minutes its time to smooth it out. I don't own a food processor but a couple trips to the blender gave me that silky smooth texture I wanted in a soup.


Apply grilled cheese sandwiches liberally to the soup and enjoy!

Hand model Rachel showing off her soup portion
My soups always turn out a little on the fresh and acidic side, but more traditional tomato soups typically add a cup of milk or cream to give it some extra creaminess and take away some of that bite that I really enjoy but that decision is yours to make.

Basil Tomato Soup

Ingredients:

For the soup:
2 tbsp butter
1 small onion, diced
2 garlic cloves, chopped
4 tomatoes, chopped
2 28 oz can crushed tomatoes
20 basil leaves, chopped
salt and pepper

For the Grilled Cheese:
8 slices french bread
1/2 lb gruyere cheese, grated
butter

Directions:

1. Melt the butter in a large pot, and add the onion and garlic. 
2. Saute for 5 minutes until onions are cooked through. 
3. Add the canned and fresh tomatoes, and basil. Salt and pepper to taste.
4. Bring to a boil, then reduce to a simmer. Cover your soup and simmer for 20 minutes.
5. Add any additional seasonings such as thyme if desired. 
6. Puree soup with an immersion blender or in a blender until smooth. If using a blender, do not overfill the blender or you may have a soup explosion. (which isn't as cool as it sounds) 

1. For the grilled cheese, coat bottom of a cast iron skillet set over medium heat with butter.
2. Place slices of french bread in the pan and top grated cheese. 
3. Let cheese melt and checking to make sure bottoms of bread isn't burning
4. Once cheese starts melting, press slices of bread together 

Enjoy your fancy grilled cheese with your soup and stay warm!